(look at the figure and imagine a line drawn from each outer edge)
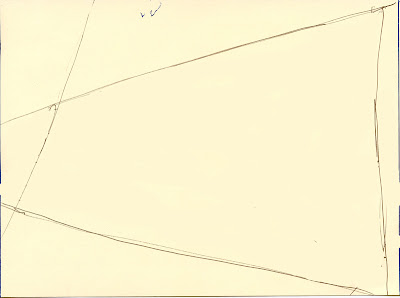
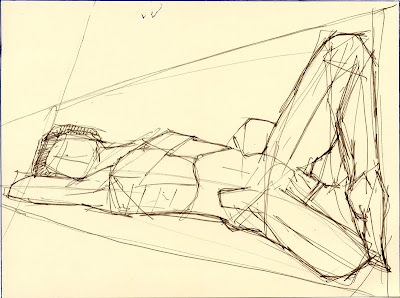
draw the main gesture of the figure.

draw the main gesture of the figure.
if you don't know where to start, try to see where the spine will be

start adding the mass of the larger body parts
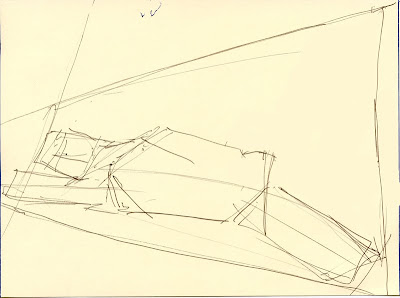
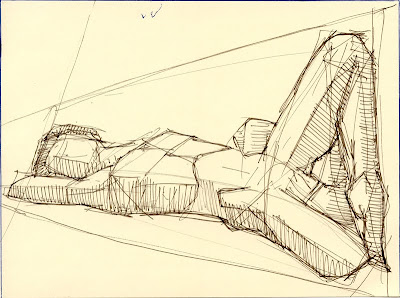
continue adding parts.

start adding the mass of the larger body parts

continue adding parts.
you may use super simplified boxy shapes.
the point is to define space.
you can make it more graceful later.
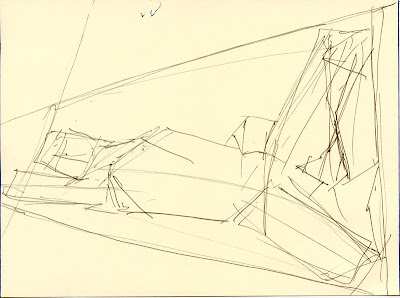
look for important structural parts, such as the rib cage
an indication of where the hips are,

look for important structural parts, such as the rib cage

an indication of where the hips are,
while you refine the outer edge
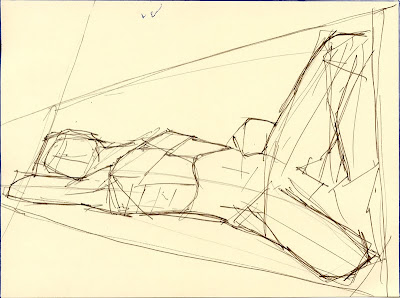
looking for shadows will help you refine the figure and make it look 3D
continue making hatch marks to refine the shadow areas.

looking for shadows will help you refine the figure and make it look 3D

continue making hatch marks to refine the shadow areas.
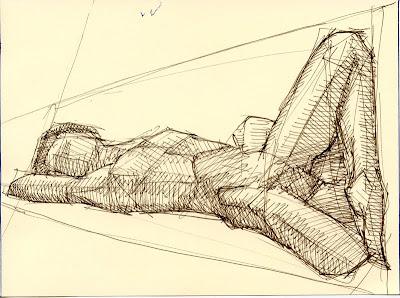
look for the super dark areas and the middle tones so you can make a distinction between the two.
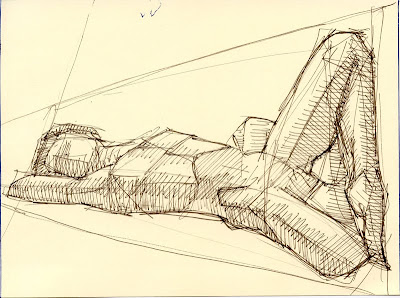
the more variety you see in the shadows, the more convincing your drawing will be
an animated GIF of the above sequence.
http://www.100waves.com/CrossHatchingFigure.gif
Here is a post about creating volume with hatching and contours using a gel pen and brush that is an extension of this same technique with a pencil.
http://gestureoflife.blogspot.com/2010/09/creating-volume.html
And another post about using the gel pen and brush for objects other than the figure is found on the general drawing blog.
http://generaldrawing.blogspot.com/2010/09/volume-contours-cross-contours.html
This link will bring you to a video that demonstrates a stylized way to create volume in a figure with simple spirals.
http://www.youtube.com/watch?v=pyV-_7QEJQk&feature=related
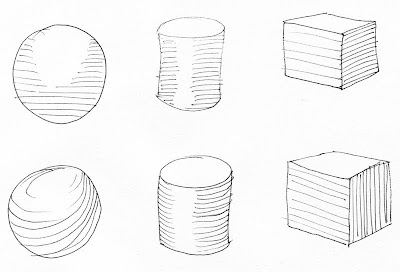
1. The top row of simple objects is shaded with hatching; straight lines create a sense of shadow.
The bottom row of simple objects is shaded with contours; essentially hatching that follows the surface contour of the object.
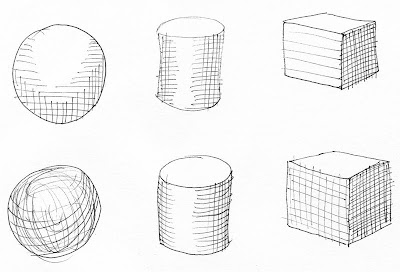
2. Top row: cross hatches are hatch marks going across the original hatch marks. Vary the placement to coincide with darker areas of the objects.
Bottom row: cross contours, like cross hatching, only continuing to follow surface contours of an object.
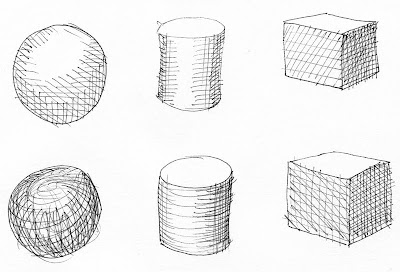
3. Continue working cross hatching and cross contours to develop more complex shadow areas.

the more variety you see in the shadows, the more convincing your drawing will be

an animated GIF of the above sequence.
http://www.100waves.com/CrossHatchingFigure.gif
Here is a post about creating volume with hatching and contours using a gel pen and brush that is an extension of this same technique with a pencil.
http://gestureoflife.blogspot.com/2010/09/creating-volume.html
And another post about using the gel pen and brush for objects other than the figure is found on the general drawing blog.
http://generaldrawing.blogspot.com/2010/09/volume-contours-cross-contours.html
This link will bring you to a video that demonstrates a stylized way to create volume in a figure with simple spirals.
http://www.youtube.com/watch?v=pyV-_7QEJQk&feature=related

1. The top row of simple objects is shaded with hatching; straight lines create a sense of shadow.
The bottom row of simple objects is shaded with contours; essentially hatching that follows the surface contour of the object.

2. Top row: cross hatches are hatch marks going across the original hatch marks. Vary the placement to coincide with darker areas of the objects.
Bottom row: cross contours, like cross hatching, only continuing to follow surface contours of an object.

3. Continue working cross hatching and cross contours to develop more complex shadow areas.
No comments:
Post a Comment